Wednesday, September 29, 2010

Clutch Cable SNAPS

What do you do when your clutch cable pulls out of the end crimp, and you are 200 miles from home?  You bodge it.  On close inspection the crimp end just pulled out of its solder.  The wire itself wasn't bent over in the channel provided to give extra strength.

Luckily the cable was long enough to tolerate some of the sheath being cut off.  This was harder than it looked, since the outer casing is made of really hard spring steel.  We broke a pair of dikes cutting it.  I then took the extra-long exposed cable and lashed it to the handle.  Vice grips were used to hold it in place, while a hose clamp was applied as extra protection.  The travel was compromised so the clutch dragged a lot, but enabled me to catch it in gear and get going when stopped.  It held the whole way home.


It was easy as long as I didn't have to stop.  Traffic was a problem, but not insurmountable.  Once I got the procedure down, I was able to push myself and catch it in first.

Tuesday, August 31, 2010

If you wanna run cool ...

... add surface area

For those of us that live in a warmer climate than the Sunbeam was designed to run in, additional cooling is desirable.  I've seen folks add an extended sump.  Well, that's more oil to circulate, but when its all hot you are back to the situation of the standard sump, it doesn't help the engine run any cooler.  It just allows you to run farther between topping up the oil.  Fiddler Fred went to extremes and added an oil cooler and an oil powered grip warmer.  I was looking for a quick solution that doesn't disturb my original machine too much, but just enhances its range and tolerance to warm ambients.

So I was thinking.  If I add some more fins to the engine, I can make it cool better.  The sump pan is already pretty low, so I can't add much, but its the most logical place.  Its a nice flat area where I can strap a heat sink.  The trick was how to attach it.  I drilled hole at the back of the heat sink to locate the rear center sump stud.  This keeps the heat sink from moving around.  Then I made two clips to pull the heat sink to the sump securely.  This locates the heat sink left and right, as well as keeping it secure.  Thermal Mastic compound (a.k.a. "monkey shit") is a must!

It's a fairly inconspicuous modification and easily reversible.  I'll have to take it out on a hot day and see if it helps.  Any little bit of energy rejection has to help.  The heat sink is rated for four Solid State "hockey puck" Relays, which handle 10 amperes a piece.  It will handle more watts of energy in this application, but it will also be running at a higher temperature differential.


From the side


The ground clearance is only reduced by about 1.1".  And no one will really notice the mod unless I point it out.

Saturday, August 21, 2010

Valve Adjustment

KYL95 was getting a little clattery in the valve area.  I hadn't adjusted the valves since I put it back together, so I figured it was time.

They didn't seem to be too far off.

Thursday, August 12, 2010

SUNBEAM bonnet letter spacing

Here you go Andrew.  Hope your Imp is doing well.

Here's the spacing as close as I can measure on my '66 MK2.  I know the bonnet has been repainted so I'm not sure if these measurements are 100%, but they look a damn site closer to "correct" than my wife's '67.  Linwood tolerances.... ;-)


Some are measured from the flats of the letters, some are from the serifs.  If I drew I line through the serif, then its measured from the flat.

Wednesday, August 4, 2010

How the S7 Deluxe looked in a period photograph???


This is my best attempted this evening to imagine what KYL95 may have looked like in period photograph when it was "new".  Black and white, a little blurry, the edges of the film not quite developed...

Sunday, July 18, 2010

Mid Ohio AMA Vintage Races

The "Friends of Nature" motorcycle gang attended the AMA Vintage Races at Mid Ohio this year.  We left Wednesday night, stopped in Bedford, then continued on to Lexington.  It only rained once on Friday, and was great for the rest of the weekend.

We stopped at the Flight 93 crash site memorial, but there wasn't a memorial.... they're still building it.  It should be rather impressive when complete.  You can see a pile driver in the background.


From RT30 we took RT119 south and then I-70 west, cut up RT18 and then onto RT39 till we reached our destination.  It was stinko hot out nearly reaching 100'F.  Keeping hydrated was key.  We stopped briefly in Steubenfille area for some lunch, to find the bikes slowly sinking into the pavement... well every bike except the Guzzi... the large kickstand is ideal for parking ANYWHERE.  Italian engineering at its finest.


The trick is arrive early at the raceway.  We got primo parking spots in the middle of everything, so we could return to the bikes for things.

Going through the swap meet area is always the best.  You never know what you might see.  It was rather annoying to have to dodge all the people on their pit-bikes.  We eventually gave up and stood our ground, since they weren't supposed to be running around on bikes throughout the facility anyway.  We saw some awesome examples of British, Italian and Japanese bikes.  Curtis found a modified CB77, with a 350 four cyl engine.  It was sweet.  He should have bought it on the spot.  Well worth the price in my opinion.  There were lots of Guzzi's running around and some for sale too.  I kept getting enthusiastic waves from the Guzzista in attendance.  (We are a passionate bunch you know)  I had the only modern Cali in attendance.

Most notably for me there were two Sunbeams for sale.  An early S7 and a later one.  They were in rather sorry shape, and the owner didn't seem too interested in parting them out.  (I really could have used that later model dynamo.)  The black early S7 wasn't too bad.  It probably needed a head gasket and the gearbox rebuilt.  Most of the parts were there.

We elected to stand in line Saturday to ride the CAN AM Spyder.  What a waste of time.  They were horrible.  Flappy Paddle Gearbox was worthless, the handling was twitchy, and the engine sounded as if it would tear itself apart with vibration.  All our throttle hands got numb on the short ride, and we condemned those 3-wheel monstrosities as unfit.  If they didn't have traction control and a computer onboard, then they would be downright deadly.

All in all we had a great time, watching the racing, and checking out all the bikes on display and for sale.  All the bikes performed flawlessly.  My California likes the open highway, but perhaps a windshield will be in order... and maybe a throttle lock.  I think we'll do it next year as well.

Saturday, July 17, 2010

A10 Fork Springs on S7 Deluxe

The recent subject matter of discussion in the Sunbeam Owners Fellowship got me thinking about how to cure the bouncing front end of my S7D.  The suggestion was to swap out the stock fork springs for slightly longer ones used on the S8, or from a BSA model A10 Rocket Goldstar.  It seemed an easy enough task after reading the Bedside Book.  I easily obtained NOS springs from the UK and went to work.

The top cap nuts and steering head bearing tensioner came out easily.

I then backed off the pinch bolts on the top triple tree.  It easily came off with a few bumps from a rubber hammer underneath.  I laid it carefully back against the tank with a towel.  (A good man always knows where his towel is.  I like to think of myself as a really hoopy frood.)

After jacking up the front end, the screws from the spring shrouds came off and I protected the mudguard with some towels as well.

This was too easy.  The next part involved some clever improvisation.  I didn't have the right spanner to remove the nuts from the top of the triple tree.  So I had to make something.  I took the next largest size socket that I had, which happened to be 1-5/8"... then taped two 10-32 screws to the inside of it.  This way the screws would grasp the notches in the nuts, and turn them off easily.

The nuts easily came off and I had access to remove the headlamp and brackets.  I left them as one piece and set them atop the handlebars and top triple tree.

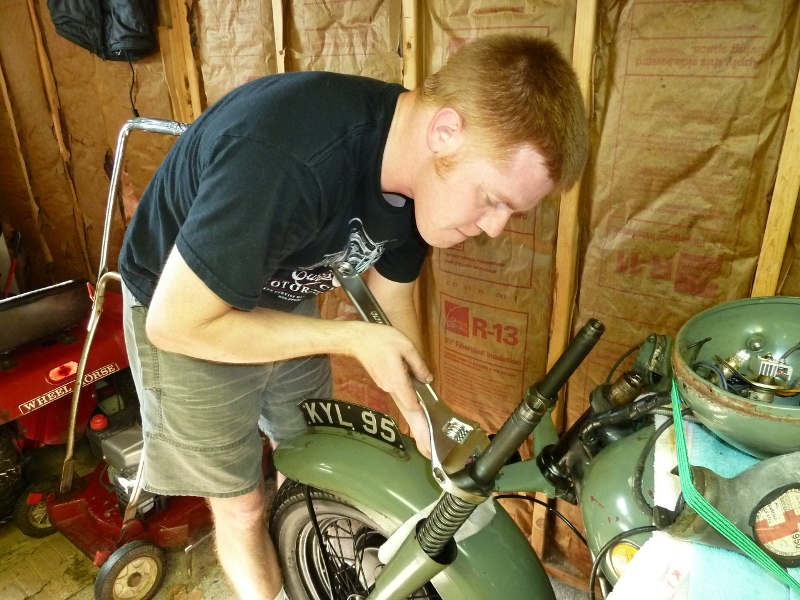
The ease of dismantling was interrupted by a trip to Harbor Freight to get a bigger adjustable wrench, since I didn't have one quite big enough to take the bottom nuts off the forks.

Reversing the order of disassembly, puts it all back together.  The forks are rather stiff now.  I hope this improves the handling as much as everyone says.  Tomorrow I shall find out.  No sense in going out to try out the handling in the dark... especially when there's a new Doctor Who episode on.