
By chance meeting I discovered this unusual small frame Vespa for sale. It requires some bodywork, but otherwise is complete and in good running shape with low miles. The original owner had used it to travel to university sometime between its purchase and the last time it was inspected for road use in 1986. With less than 4000 miles on the clock, the engine should be in decent original shape. I struck up a deal to get it out of their shed and into a good home.

The overview given by Robot from Scooter West shows off the unique aspects of the scooter, the 100 Sport is a good small frame Vespa scooter. The 96.1cc engine with 3 transfer ports is a small improvement to the earlier 88.5cc model 90. The performance is a whopping 3.1 hp and probably does max out at just under 50mph. The misconception is that a 3 speed gearbox is somehow less desirable than a 4 speed. The top ratio is just about the same, so the rev range between shifting gears is just greater and more fun. With 10" wheels it sits appropriately high enough for the average rider, but is small enough for youngsters and petite ladies. Another advantage is the 12 volt electrical system. As standard it has a battery for the DC portion (Horn, turn signals and tail light), and AC for the headlamp. This isn't particularly favorable since the battery isn't much use when the engine stops and you can't see where you are going. The standard breaker-points and condenser system run off their own coil, so the engine can run without the rest of the electrical system. The battery is particularly a disadvantage because it is a maintenance item, and produces corrosive gases that have rotted the battery compartment. (Plans are to convert to a battery-less electrical system.)
This small frame scooter unadorned with any accessories weighs in at less than this rider. The handling is pretty good, but the front end brake dive is unnerving. (That may have to be upgraded) There's no reason the 96.1cc jug cannot be upgraded to any aftermarket kit available with very little effort. The stock jug bolts at the bottom, but longer head bolts can be swapped out to bolt on a full 135cc aftermarket kit.
The small size and light weight of this scooter make it ideal to strap to the back of the family car using a simple hitch hauler. When on a camping trip this small scooter is ideal for running errands and going on explorations. It is also a great about-town set of wheels just to pop over to the local watering hole or shops.
So that's the good. The bad is that this particular example was left outside for an indeterminate period of time between 1986 and present day. The floor boards came equipped with ventilation in the form of rust holes. This is not insurmountable for someone with welding and painting skills.
The overall plan consists of getting everything working and mechanically sound before complete disassembly to launch into a full body restoration and paint. The following must all work reliably to get it on the road: Engine, Ignition, Lights, Horn, Suspension, Controls, Mirrors, and Brakes. By tackling the smallest most insignificant problems first it provides a sense of accomplishment and drives the project onward. Anyone who has read Zen and the Art of Motorcycle Maintenance (a book by Robert M. Pirsig) will recognize the need for gumption to see a project to completion. Without small victories and the desire to reach completion, projects just linger on and eventually are sold off due to lack of interest. Therefore, the holes in the floorboards are the last thing to deal with because that is the most difficult thing to overcome. Painting preparation is the most soul sucking task for me, and I detest it. If I try to do that first, this project will be devoid of fun, and we can't have that. Many may argue this as backwards thinking, but the body of the scooter is still structurally sound so it isn't a big problem. This restoration is the opposite of what I usually look for. Ideally I would want a blown engine and a good body, but that's not what I've chosen this time.
Starting with basic needs, I need a working ignition switch. Since it didn't come with a key, I researched getting a key cut by the code numbers. This proved to be within a few dollars of getting a whole new ignition switch from Scooter Mercato. The choice was easy. Matching the convenient color coding and numbers from the sticker on the inside of the headset made this job easy.


The next basic need was to get a headlight and bezel. I turned to Scooter Mercato again for the solution. The original headlight was a sealed beam unit that is no longer available, so this replaceable bulb unit to fit a motorcycle style S1 bulb with a 2 cm 'BAY20D' bayonet base provides the solution. (These are not easy to find at local stores, and also needed to be mail-ordered.) The mounting method is fairly obtuse. A hollow screws with a square nut fastens the headlamp reflector and glass assembly to the headset in three places (3, 6, and 9 o'clock positions). The problem is that the bottom is missing some piece leaving a hole, so I had to fabricate the missing tab out of some stainless steel that I had laying about. This is a job for two people to keep the square nuts aligned with the slots in the reflector glass assembly. Its a tricky fit to get everything aligned and pushed home into the headset. Once the headlamp is mounted the bezel slips over top and is affixed by three brass screws from the outside of the bezel. The headlamp is supposed to be adjustable with the bezel off, but the process isn't the easiest thing to do in practice.


The horn was open-circuit when checking between the main terminals. This is usually just corroded terminals on the vibrating contacts, and it did turn out to be the problem in this case. That was fixed as documented at this link.
The 100 Sport has two indicator lamps on the headset. One is for a neutral switch indicator, the other is for a high beam indicator. High Beam is kinda a joke since both filaments are 25 watts. Regardless the contact between the wire connector tab and the rivet of the bulb contact was really corroded. A bit of patience and a quick soldering iron solved that problem for a secure connection. Relying on the headset casting for a good ground is probably a poor practice. I may run additional common wires to the Black common wire in the final installation. They work now, so I won't complain.
I needed an easy task for my workshop helper. These are probably not even close to the original mirrors, but I chose them very carefully. The biggest issue I have with mirrors is that they reach a resonant frequency with the engine at some point. When a mirror starts vibrating you can't see through it very well, and it isn't providing the safety feature that it was installed for. There's really not a lot you can do about that with most mirrors. The length of the stem and the weight of the mirror assembly creates a tuning fork effect and it will just vibrate sympathetically with a harmonic to the engine rotational speed. These mirrors are different. They can be adjusted up and down, and can be turned to the left or right side. I saw this as a huge advantage, as they can be de-tuned to not resonate with the engine at any running speed and remain still so they can actually be used to look behind you without distortion.

Another "low-hanging fruit" was to recover the seat. The original seat cover was shredded by age, and was beyond restoration. Once again my preferred parts supplier came through with a great reproduction saddle cover for a reasonable price. I couldn't sew one up for the same cost by myself. The seat frame had a little rust where the water laid where the cover had contained moisture. The pillion strap handle screws were very rusted. With some "Blaster" penetrating oil, and some steady wacks from an impact screwdriver the screws were slowly worked loose. The rust was so bad that the only viable way to re-use them was to strip the rust by electrolysis. This method is well documented elsewhere. Some quick sprays of rust inhibitor primer and a top gloss coat of black paint returned the seat frame to great condition. Recovering using the original rust-resistant clips was a breeze. My helper held things in place while I positioned the clips. The seat cover vinyl was so thick I had to punch through it with a hot smelly soldering iron.


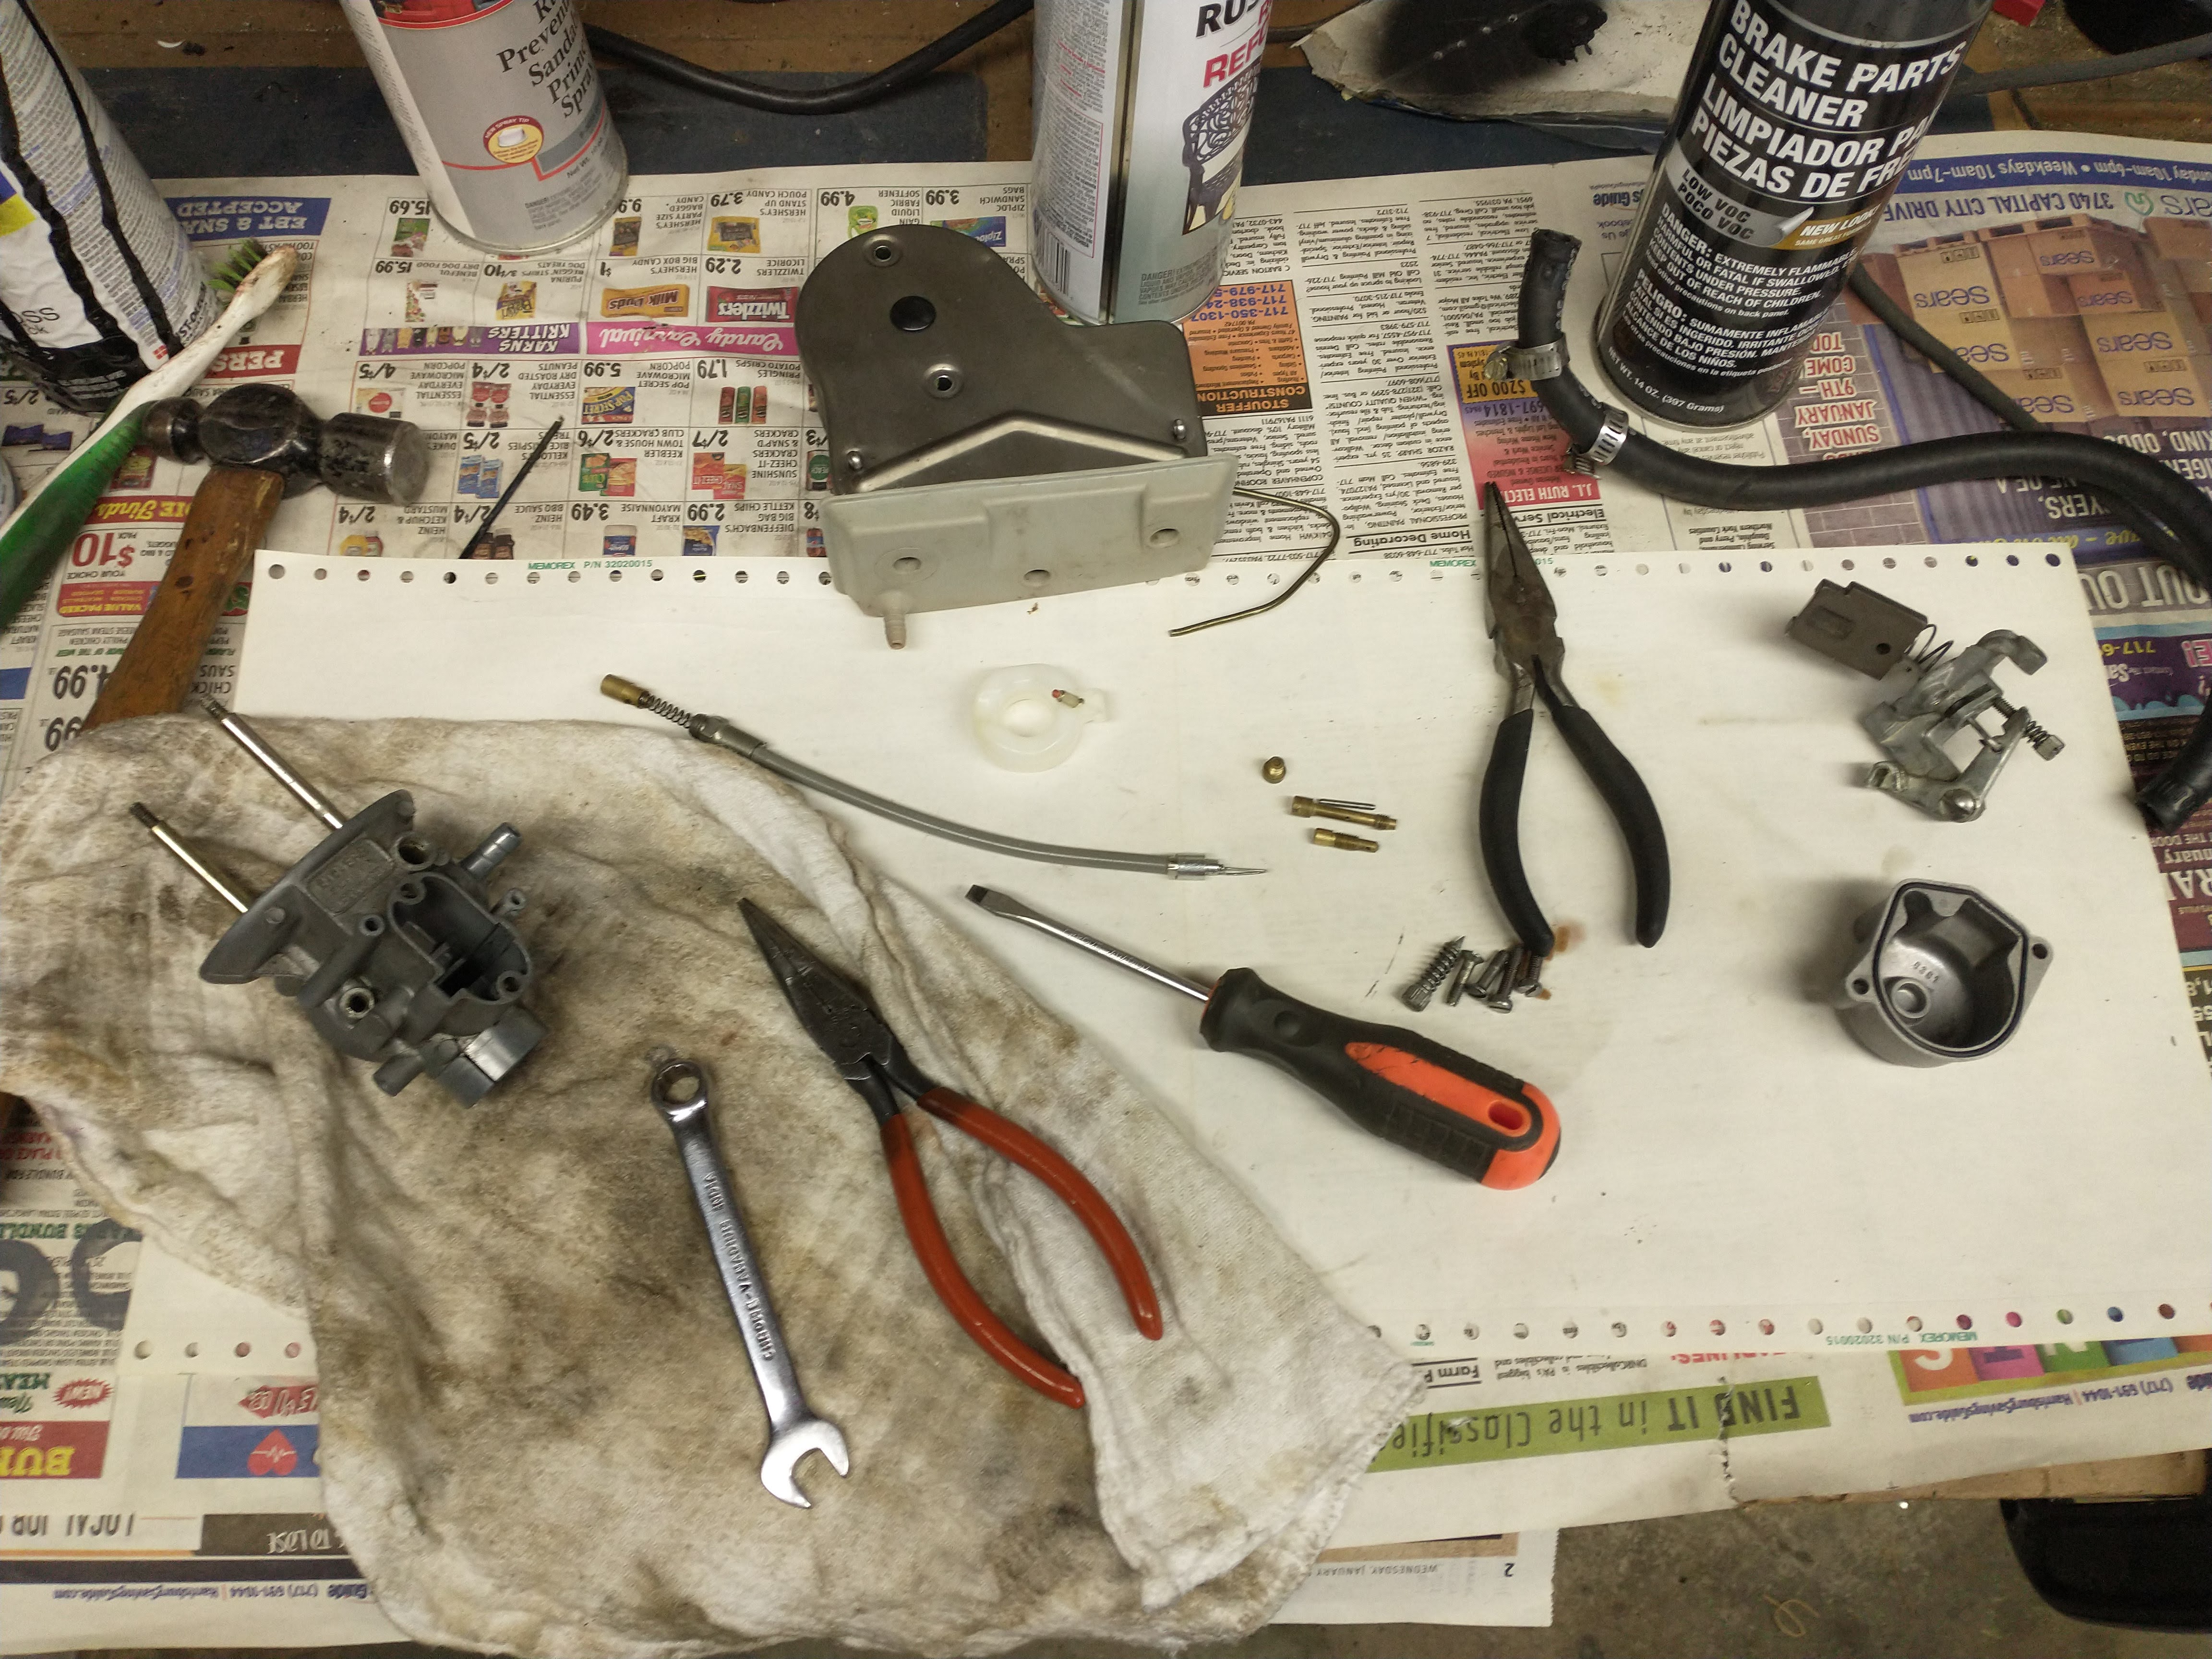
I was in shock when I opened the air filter to discover the original wad of metal mesh installed as a filter. This metal could potentially break off and enter the engine. I consider this a very inadequate air filter, and felt it should be upgrade to a foam, similar to what Scooter Center advocates. It has been a while since this engine was run, so an obligatory carb cleaning was required. All the jets were removed, and everything was blown out with cleaner and compressed air. The standard carb is very simple and required no special skill to clean out. I found this website from smallframes.com very helpful.


No comments:
Post a Comment