I may have mentioned in a previous post that always wanted a Vespa PX, but due to pressures of my biker friends that nothing less than 500cc's was going to keep up with them, I avoided purchasing scooters when they were at their height of popularity when the PX was re-released in the early 2000's. When this wrecked Genuine Stella 2T came available locally on craigslist, it was too cheap to pass up. That combined with my recent career move to a job closer to home, the time was right to jump into the scooter world. Wrecked and abused, she served well for about a year or so.
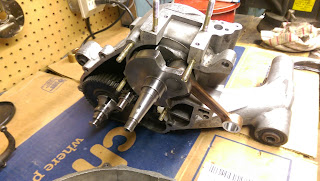
The crank big-end bearing failed in a catastrophic manner. Though she got me home that night, it was time for some major upgrades.
Night Flight
A red scooter is the best way to get around,
No other transport is finer that I have found.
A tank full of fuel will take you so far,
To visit with friends or hang at the bar.
After a dinner, its homeward we go,
Travel is pleasant its like we're on show.
Engine burble turns heads, like they've never seen,
So beautiful a cherished painted art scene.
My Italian-descended tibutation in style,
Nothing of late could bring such a smile.
A pinging was heard; whatever to do?
A loss of compression would surely ensue!
Darkness it came and I filled with dread.
It wasn't far to get back to the shed.
Coaxed up the hill giving all that she could,
The crest was ahead; I felt that we would.
Then plunged into darkness; nothing to see,
But a green lamp on the dash shining at me.
Off with the key and in with the clutch,
If I hit a tree, I'm sure it'd hurt much.
The whispers of wind was all that was heard,
The engine had died, and I uttered a word.
Word of complaint ruined my ride,
The headlamp was out! I could'a cried.
Some short distance more under the tree,
The moonlight provided little to see.
No push was needed; she showed such pride,
And that was the end of our valiant ride.
The search for more power is an ongoing effort when you buy a vehicle to rebuild. I had already fitted the Sito+ exhaust fitted and re-jetted at the time of crank failure. The logical step was to either buy a 200cc engine or do a kit for more cubes. In a way it would have been easier to just drop in a ready-built engine, but where is the adventure in that! I decided on the DR177 kit. David at Scooter Mercato was a big help in making the right choices for good reliability and more torque.


First, let's say that the PX engine is a NASTY dirty thing when it is abused or neglected, whether it is an Indian or Italian engine. The gearbox breather sits atop the engine. The breather is capable of producing enough oil mist to cake the cases over time. The overflow from the carb should not be a real issue, but it is something to watch. I abhor dirty engines and oil leaks. When I heard that most folks stand by the age-old grease on the gaskets approach, I was appalled. Engines should be built to stand the test of time and not leak. So after spending DAYS of scrubbing down this filthy mill I vowed to keep it clean. That meant when it was time for re-assembly I was going to use Permatex "Right Stuff" and spray-on Gasket Sealants. Whether it was needed or not, I also ran a road tube from the gearbox breather to the back of the engine. It can't hurt to keep things cleaner. The other addition is an exhaust spoon. This is a piece of 1" stainless tubing cut out and cold-formed in a spoon shape. The end clamps to the exhaust stub and is held in place with a hose clamp. The idea is to re-direct the oily exhaust away from the rear tire without changing the dynamics of the 2 stroke exhaust chamber.

Another requirement was to keep the autolube system. I hate mixing, the thought of having to mix oil every fuel stop was not something I ever wanted. The autolube system is a technological innovation that I believe in. Since the jump from 150cc to 177cc isn't a big one I figured that things should be lubricated just fine. I usually dump a little Marvel Mystery Oil in anyway, so a little extra oil should be just fine. The problem was that the 2009 year LML autolube carb box had a machining issue which would allow oil to go past the check ball and fill the crank chamber with a large charge of oil. That would result in a large embarrassing cloud of smoke in the morning. I tried to overcome it on my own, but if I was re-building the engine I didn't want to take any chances. SIP shop had replacement autolube carb boxes available, so I bought one to put on.
(oh yes, I did!)
Since I was re-jetting anyway, another easy modification was for a more free-flowing air filter. The white and blue material of the original was all oil-contaminated, so cutting it all off was an easy choice to make. I had some leftover UNI filter material left over from a previous cycle overhaul. That was easy to cut into the right diameter loop and slip over the original air filter frame. It was cut the right shape to completely cover and insure good filtration with the best air flow possible.
The only thing I didn't change was the reeds. The LML reeds seemed good, so I just put them back on. This may prove an easy upgrade later. Goodness knows with all the carb jet experimentation that I've done, going to a bigger jet is as easy as looking in the box of spare parts that I already bought. So for now the original reeds should do.

After MUCH experimentation, a lot of reading other's accounts of what carb and jets they were using, I settled on the following. This is based on plug chops, and cylinder head temperature readings. The TrailTech gauge is battery powered and easily attaches to the glovebox on the scooter. The wiring had to be extended to reach the whole way back to the cylinder, but that wasn't much of a problem. Observations were that when the engine was running rich, the CHT gauge would read very low. If it was too lean, of course the CHT readings would be too hot. The trick was to find the happy medium of Main Jet that yielded a middle CHT reading without going too far above 300°F on a hard pull.
Stock 20/20 carb 40/120 idle, 160 air, BE3 atomizer and a 106 main jet.
19° BTDC ignition timing.


